
This is first post in the series that describes building a simple Todo application using Mojito. The constraint that we have in our first implementation is that the controller will have common affinity.
As a prerequisite to understanding the implementation, I would assume that you are well versed with JavaScript and are hands on with Mojito. If not, it may be worthwhile to explore my initial posts on getting started with Mojito.
The complete code generated can be structured in the following steps:
- Initial code generation using Mojito CLI tools
- Application and routes configuration
- Initial UI – View and CSS
- Model
- Controller
- Binder
- Action – List all TODOs
- Action – Add a TODO
- Action – Edit a TODO
- Action – Mark one or all complete
- Action – Delete a TODO
Step 1: Initial Code generation using Mojito CLI Tools
We start by creating a Mojito application – todomvc, and adding a mojit, TodoMojit. The steps are pretty simple:
$ mojito create app todomvc
$ cd todomvc
$ mojito create mojit TodoMojit
Step 2: Application and routes configuration
The next step is to update application.json and routes.json files.
Application configuration file is updated for the following changes:
staticHandlingsection for application namespecssection to register the mojit
[
  {
    "settings": [ "master" ],
    "appPort": 8666,
    "specs": {
      "main_ui": {
        "type": "HTMLFrameMojit",
        "config": {
          "deploy": true,
          "title": "Yahoo! Mojito • TodoMVC",
          "child": { "type": "TodoMojit" }
        }
      }
    },
    "staticHandling": {
      "appName": "todomvc"
    },
    {
      "settings": [ "environment:development" ],
      "staticHandling": {
        "forceUpdate": true
      }
    }
]
Routes configuration file is updated for:
- Mapping the
indexaction of the controller to/path.
[{
  "settings": [ "master" ],
    "root": {
      "path": "/",
      "verbs": [ "get" ],
      "call": "main_ui.index"
    }
}]
Step 3: Initial UI – View and CSS
Now that we can access our application at http://localhost:8666, it is time to make initial user interface – the view and CSS.
We will require the following existing artifacts from TodoMVC project:
Copy all these files to mojits/TodoMojit/assets folder.
Open mojits/TodoMojit/views/index.hb.html and update it using the template provided in the TodoMVC project at https://github.com/addyosmani/todomvc/blob/gh-pages/template/index.html.
There is, however, one catch with it. We will not use it as is. Notice that this is complete HTML where as in our case, the page chrome is emitted by HTMLFrameMojit. Also because Mojito does not provide any client-side routing by itself, we need to remove that section as well.
Essentially, what we are left with it bare-bone view that comprises of the header, main and info sections. Our final index.hb.html looks as below:
<div id="{{mojit_view_id}}">
    <section id="todoapp">
		<header id="header">
			<h1>todos</h1>
			<input id="new-todo" placeholder="What needs to be done?" autofocus>
		</header>
		<section id="main">
			<input id="toggle-all" type="checkbox">
			<label for="toggle-all">Mark all as complete</label>
			<ul id="todo-list"></ul>
		</section>
	</section>
	<div id="info">
		<p>Double-click to edit a todo</p>
        <p>Created by
          <a href="https://github.com/gvaish">Gaurav Vaish</a>
        </p>
		<p>Part of <a href="http://todomvc.com">TodoMVC</a></p>
	</div>
</div>
Delete mojits/TodoMojit/assets/index.css – auto-generated file.
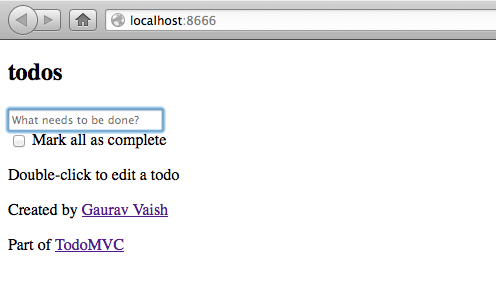
At this time, if you run the application, the UI will be as shown next:
Step 4: Model
Now that we have basic UI in place, it is time to look at our model. Delete the auto-generated model at mojits/TodoMojit/models/foo.server.js and create a file mojits/TodoMojit/models/todo.common.js. The model affinity is common in sync with our main restriction.
We will use CacheOffline as the store to persist the todo-items. This makes use of localStorage in the browsers where available.
The initial code of the model look as below:
YUI.add('TodoMojitModelTodo', function(Y, NAME) {

  var storage = new Y.CacheOffline();

  Y.namespace('mojito.models').Todo = {
    init: function(config) {
      Y.log('Initializing... ', 'info', NAME);
      this.config = config;

      var initData = storage.retrieve('todo');
      if(!initData) {
        storage.add('todo', []);
      }
    }
}, "0.0.1", { requires: [ 'json', 'cache-offline' ] });
All that this piece of code does is initialize the storage and ensure that it contains an empty list of todo items.
At this point in time, the application is in an erroneous state because the model used in controller is no longer available.
Step 5: Controller
Couple of things that are seriously broken are stylesheets and model. Firstly, though we added the files, we do not refer to them in final UI. Secondly, the controller needs to access the new model definition.
To inject the css and js files in the final output, we make use of the addBlob method of the assets addon. Additionally, we rename controller.server.js -> controller.common.js as per our constraint.
Change the file contents to as below:
YUI.add('TodoMojit', function(Y, NAME) {
  "use strict";

  Y.namespace('mojito.controllers')[NAME] = {

    index: function(ac) {
        ac.assets.addBlob('<meta charset="utf-8">\n<meta http-equiv="X-UA-Compatible" content="IE=edge,chrome=1">', 'top');
        ac.assets.addBlob('<link href="/static/' + ac.type + '/assets/base.css" rel="stylesheet" type="text/css" />', 'top');
        ac.assets.addBlob('<!--[if IE]>\n<script src="/static/' + ac.type + '/assets/ie.js"></script>\n<![endif]-->', 'top');
        ac.done({});
    }
  }
},  '0.0.1', {requires: ['mojito', 'TodoMojitModelTodo',
     'mojito-models-addon',  'json',
     'mojito-assets-addon', 'mojito-params-addon']});
Analyzing what we have done is:
- Writing in strict mode – a requirement of the TodoMVC project.
- Added HTML-blob in the
headsection of the HTML page.
We need to do #2 above because because that how the HTMLFrameMojit allows you to inject meta and other HTML. Line 8 above is not necessary – we can configure that part using application.json configuration as well. For the sake of keeping code at one place, I choose controller.
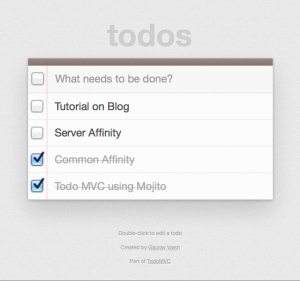
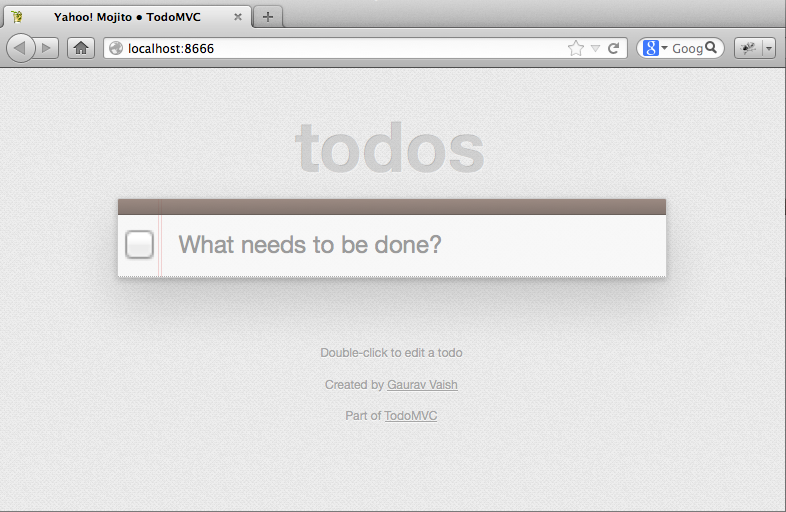
Start the application again. Because we have styles in place, we expect an enhanced UI as shown below.
Step 6: Binder
Binder is the client-side component that runs in browser and provides the glue between the UI/events and controller. The default binder code can be found at mojits/TodoMojit/binders/index.js.
Binder has strictly two methods that are invoked by the Mojito client runtime:
init– called before DOM is setup. This method is passed a reference to proxy-object for the mojit.bind– called after DOM is setup. This method is passed a reference to the Node from the view rendered. It is required that the view must have one top-level element and either this or one of the child nodes has id of{{mojit_view_id}}.
Update the code of the binder to as follows:
YUI.add('TodoMojitBinderIndex', function(Y, NAME) {
  Y.namespace('mojito.binders')[NAME] = {
    init: function(mojitProxy) {
      this.mp = mojitProxy;
    },

    bind: function(node) {
      var self = this;

      this.node = node;
      this.inputNode = node.one('#new-todo');
      this.listNode = node.one('#todo-list');
      this.toggleAll = node.one('#toggle-all');
      this.main = node.one('#main');
    }

  };

}, '0.0.1', {requires: ['mojito-client', 'node', 'json', 'escape']});
The changes are described below:
- Line 4: Shortened the variable name to
mp. - Line 10-14: Cache important items – root node for the UI-container, input node, list-container, list and toggle check-box.
- Line 19: Added dependencies as we need to HTML-escape any input and our data model to communicate will be JSON.
At this point, we have initial view of our application ready. I will put up the code for the next set of steps – the crux, the actions – in next post.
Leave a Reply